Move prepositions at the end of line
 I still encounter problems when typing texts in Word and sometimes comes preposition or conjunctions at the end of the line. If you care about that it should not be at the end of the line, it must moved to the next line, but not with several spaces or by Enter! How to do it correctly, without new paragraphs, you will read in this article. If this guide has helped you, become a fan on Facebook and recommend this site to your friends, it can be useful for them too.
Prepositions should definitely not be displayed at the end of lines. Always must be connected with the following word. In order to move preposition together with the following word, we must move it from the end of the line. Many people mistakenly believe that they will achieve that by repeatedly pressing space, tab, or even enter. But beware, eg. Enter will end a paragraph and starts a new paragraph. It would thus completely separate piece of text and in future revisions just would make mischief.
Shortcuts described below work in all versions of Word and even in some other Office applications. Other commands and icons described below works for version 2007 and newer.
- If the text is in final form, and we will not modify its format in the future such as font type or size, you can use the so called line break with Shift + Enter. Place the cursor immediately before the preposition at the end of the line and press Shift + Enter. The text after the cursor moves to the next line to the next word. If you turn on the display hidden characters (unprintable) option on the Home tab, the icon of the Greek letter “pi” will emerge as a line break angled arrow on the end of the line. Thus we may in the future determine where we put line breaks and eventually delete it.
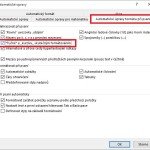
- The second procedure, the best is called nonbreaking (hard) space. This symbol, written instead of the original spaces between words by pressing Ctrl + Shift + Spacebar, permanently connects these words, never to be broken words at the end of the line – so they’re always together, even after changing font sizes. Hard space Word automatically inserts after every single letter preposition (confirmed for Czech version). This is ensured by setting AutoCorrect options. Hard space in the mode of seen printable characters recognizable as a small circle between words (like a degree).
Working procedure to replace all spaces for single-letter words (prepositions and conjunctions) is:
- open replace windows by Ctrl+H
- to field “Find” set “<(?)> ” (without quotes); where <(?)> finds single letter with a space
- to field “Replace with” set “\1^s” (without quotes); where \1 means the single letter and ^s symbol meants hard space
- press “More” button and check the field “Use wildcards”
- press “Replace all” button


27 Comments
Mezery za všemi jednopísmennými předložkami a spojkami lze nahradit za pevné mezery v celém dokumentu najednou pomocí nahrazení (Ctrl+H) s využitím “wildcards” (mám jen anglickou verzi MS Word) následovně:
– otevřít okno nahrazování pomocí Ctrl+H
– do pole “Find what” zadat ” ” (bez uvozovek)
– do pole “Replace with” zadat “\1^s” (bez uvozovek)
– stisknout tlačítko “More” a zaškrtnout checkbox “Use wildcards”
– stisknout tlačítko “Replace all”
Skvělý nápad. Ale ještě bych ho poopravil, takto mi totiž nefungoval a navíc by se nahradily úplně všechny mezery a ne jen za jednopísmennými předložkami.
Správné řešení pro českou verzi je:
– otevřít okno nahrazování pomocí Ctrl+H
– do pole “Najít” zadat “<(?)> ” (bez uvozovek); kde <(?)> vyhledá práce jedno písmeno a za ním mezeru
– do pole “Nahradit čím” zadat “\1^s” (bez uvozovek)
– stisknout tlačítko “Více” a zaškrtnout políčko “Použít zástupné znaky”
– stisknout tlačítko “Nahradit vše”
No sice je to skvělý, ale když už je napsaný text, aniž bych cokoli dělala s formátováním, tak u některých spojek mi to udělá automaticky, ale u některých ne, pokud chci pevnou mezeru vztáhnout na celý dokument, tak pak musím ručně vymazat mezery a u těch, co mi to udělalo automaticky, tak to musím taky ručně vymazat….Jinak co používáte a \1^s, tak to nemusíte specifikovat a ono to upraví spojky (i,v,k,a) pak musíte u těch víceslabičných dávat do vzoru už tu konkrétní spojku či předložku….. nevíte, co tedy se dá udělat s těmi mezerami?
Řídila jsem se postupem, pevná mezera se mi tam sice vložila ale spojka mi přesto zůstala na konci řadku a nepřesunula se na začatek řádku! Prosím poraďte, co dělám špatně, opravdu už nevím co dělat 🙁
Dobry den, nejcastejsi chyba je, ze se tam omylem necha i puvodni mezera a pak to ztraci efekt.
Stačí, když se to napíše ” ” s tím, že za tím symbolem je ještě mezera a je to naprosto vše v pořádku.
Dobrý den, přišel jsem na to, ale dalo mi to zabrat. Napíši příklad pro písmeno “i”…
-otevřít okno nahrazování pomocí Ctrl+H
– do pole “Najít” zadat “(_i_) ” (bez uvozovek); kde _ je mezera pomocí mezerníku, závorky ponechat
– do pole “Nahradit čím” zadat “_i^s” (bez uvozovek); kde _ je mezera pomocí mezerníku
– stisknout tlačítko “Více” a zaškrtnout políčko “Použít zástupné znaky”!!!
– stisknout tlačítko “Nahradit vše”
Dobrý den,
mě se z vašeho návodu bohužel vytvořily dvě mezery mezi předložkou a slovem.
Máte prosím návod, jak se toho zbavit? Bohužel jsem si toho všimla až později a můj stostránkový dokument už uložila. Moc děkuju.
Tento článek mi moc pomohl, mockrát děkuji!!!!
I já mnohokrát děkuji!